

Logging In
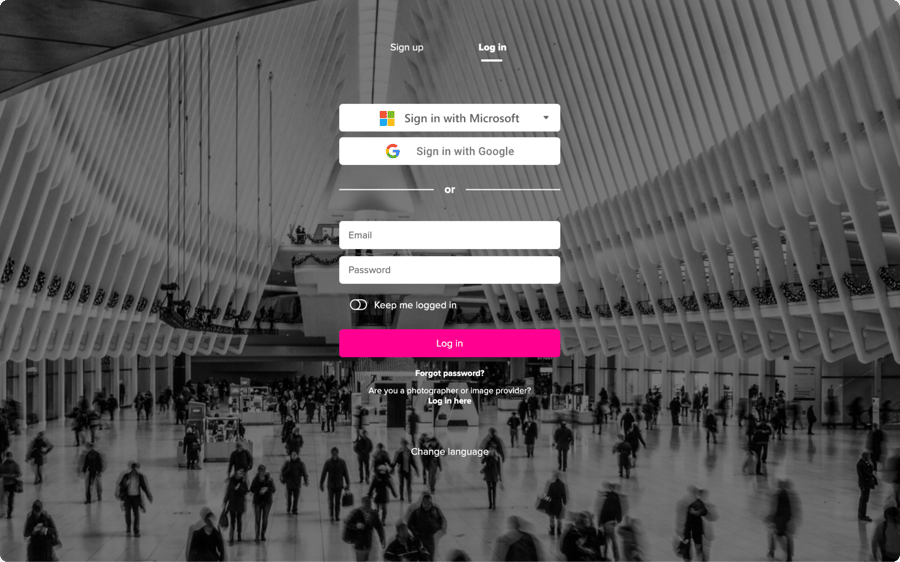
Administrators must log in to the online version of Pickit to manage Media. You can log in using your email/password credentials or single sign-on at app.pickit.com.
Once signed in, you will see the Public facing view of the DAM that end-users will also have access to. From here, only administrators can see the button that says Admin Mode. Click here.
Now you'll be on the home page for Content Administration and see a list of the core features including Media.
First Look
The navigation bar on the left side of the screen can be expanded or minimized with the arrow icon at the top. When expanded you will see, depending on your plan, Home, Web app Mode, Media, Documents, Guidelines, Insights, Image Rights, Approvals, Pickit Family, Users and More. This guide focuses on the Media section. Please reference our product guides page to learn more about the other features.
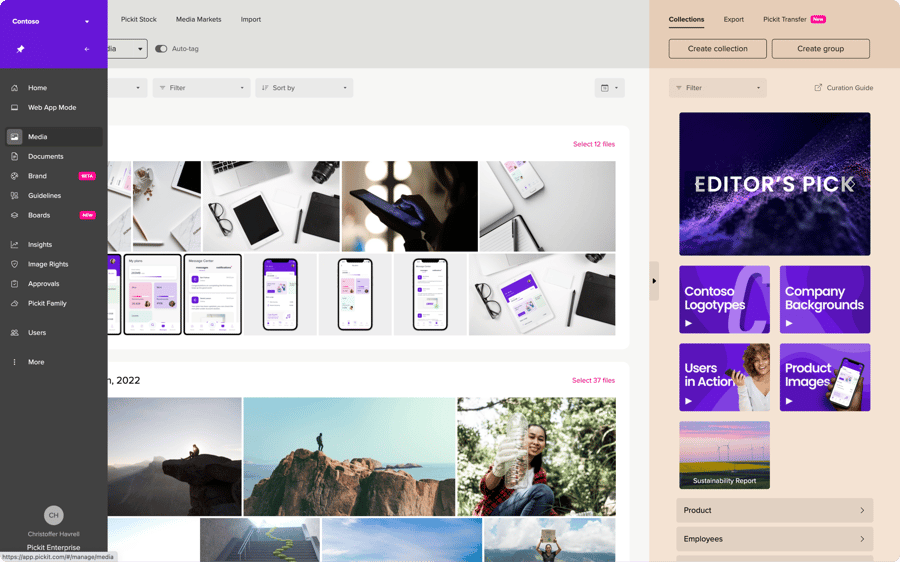
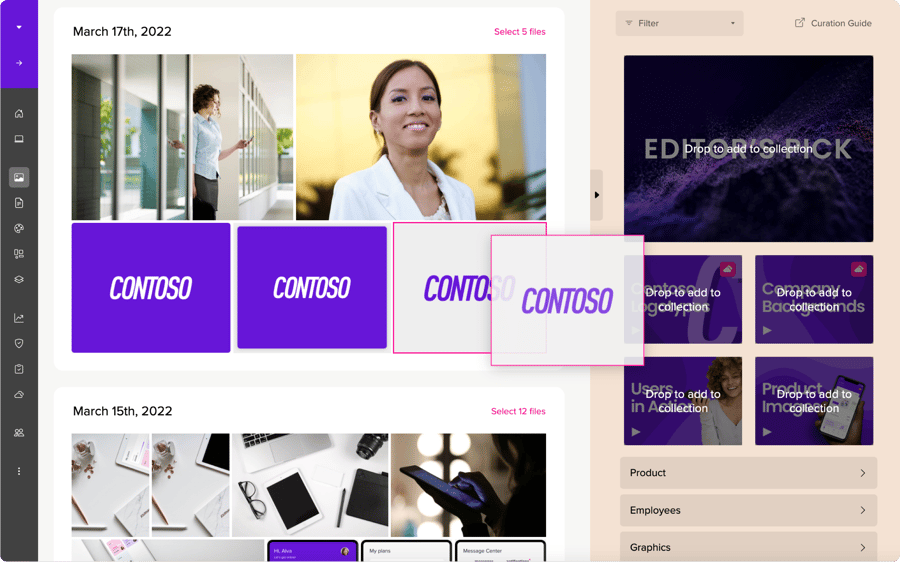
After you select Media from the navigation bar, your screen will display two sections at the same time. The left side of the screen shows Media and the right side shows the Curation view.
Media


How to Start
This view is where you can upload and organize your image, video and audio files. Pickit supports file types .ai, audio, .eps, .psd, .tif, .jpg, .gif, .png, .svg, .mp3 and .mp4. You can upload a batch of 50 files at a time and there is no limit on individual file size.

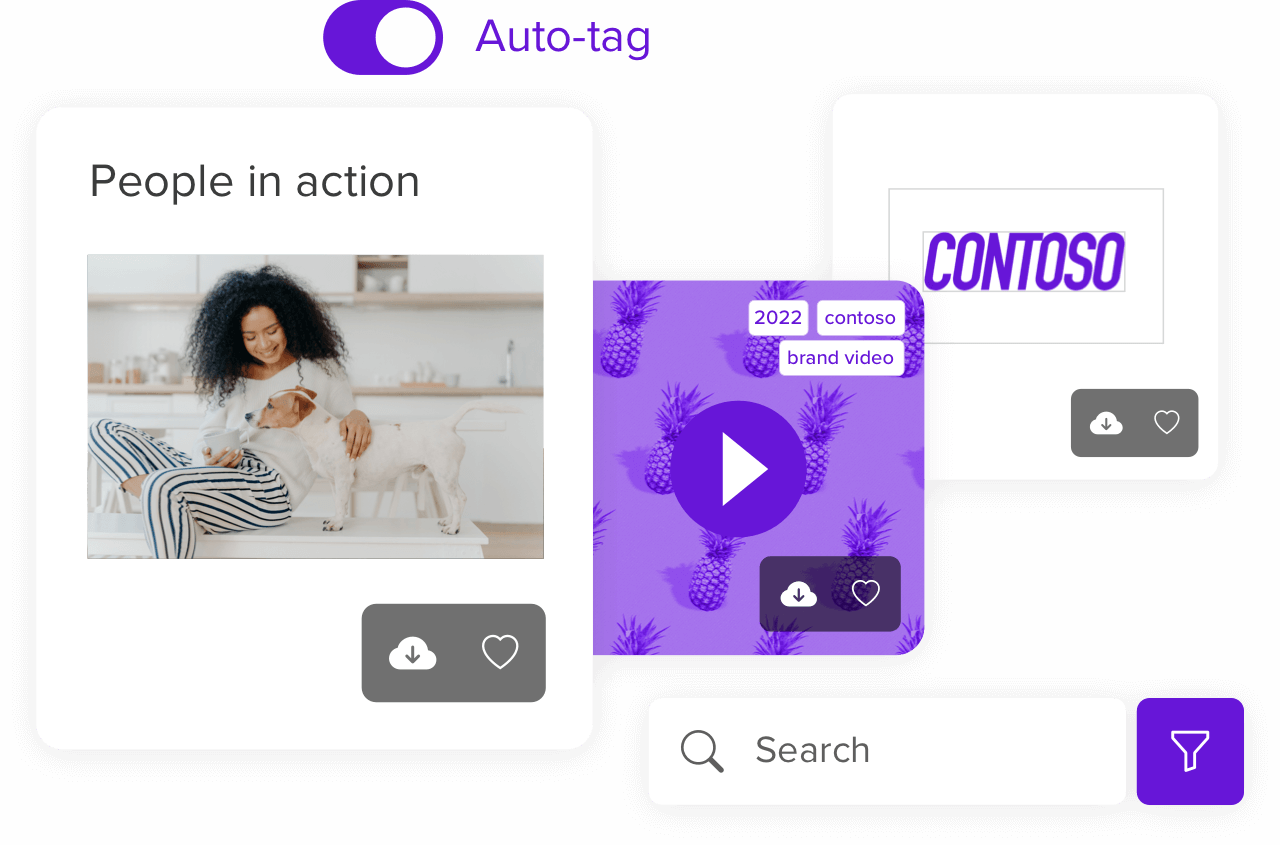
Pickit provides an optional Auto-tag feature when you upload media files. This means our AI system can automatically create keyword tags based on what is in the file. You can always edit, add or remove tags. To activate Auto-tag, click the toggle so it appears black.
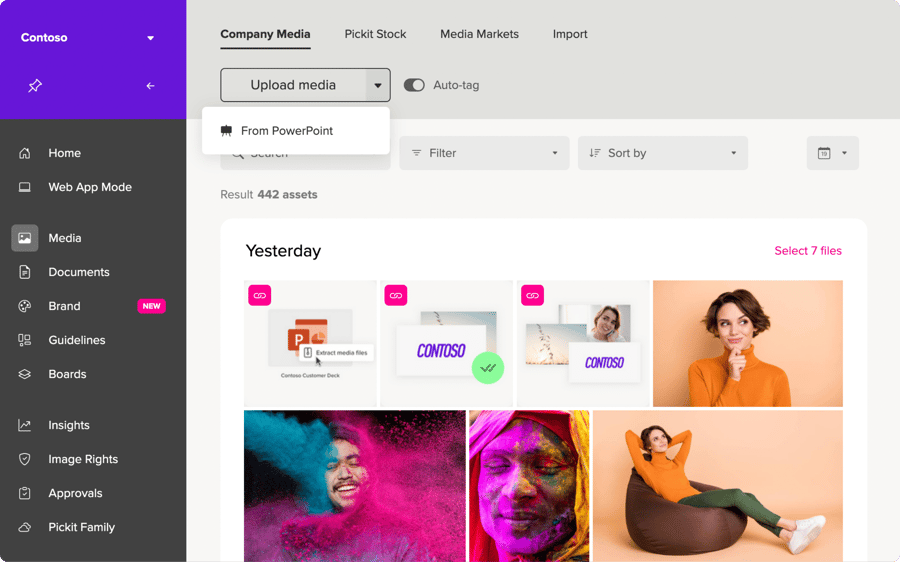
To start uploading, click the Upload media button on the left side of the screen, this will launch your file manager. From here just select the files you'd like to upload, up to 50 at a time. This view will compile all of your media files and functions separately from the collections in curation. You can also upload files directly to collections, which will automatically save to your Company media view. To learn about this process please reference the Curation section below.
The default view separates media files by upload date, also referred to as Sessions. You can change this view by selecting the calendar icon with the drop down arrows. Here you can select Details, which displays a small filetype icon on each file, or Gallery, which excludes all information and shows the visuals or Table, which displays detailed information. From this view you can also change the default file display size to Small, Medium or Large.
Extract Media from PPTX
Edit File Information
You can either select one file at a time or multi select to edit information for all selected files at the same time.
One file - Edit collections, Description, Tags, Share to, and License for this specific file.
Multiple files - Edit collections, Description, Tags and Share to for all selected files.
Please reference the Sharing section below to learn more about Share To.
Additional Filters and Views
There are several filter and view options, so finding and organizing files is easy.
Search - Search by filename, keyword or description.
Filter Type - Select Any or one file type to display at a time. Only file types that exist in the DAM will appear as an option You can choose AI, Audio, EPS, GIF, JPG, PNG, PSD, RAW, SVG, TIF, or Video.
Filter Collection - Select one collection to display at a time from your existing collection list.
Filter Source - Select one source at a time. You can choose between All, Pickit Stock, Uploaded or any integration you have imported from (Getty Images, Adobe Stock, Shutterstock, Microsoft 365, Dropbox)
Filter Uploaded By - If you have multiple admins, you can sort by which admin has uploaded files to Pickit.
Filter Color - Select one color at a time and Pickit will display the files that align with this color.
Sort by - Allows you to organize the order of files by Name A-Z, Name Z-A, Newest first or Oldest first.
You can use multiple filters and one sort by view at the same time. Here are two examples:.
Example 1: Display JPG file type, in Collection 1, from Pickit Media. Sort by Oldest first.
Example 2: Display Any file type, in Any collection, from Getty Images. Sort by Name A-Z.
Pickit Stock™
Pickit Stock™ is a library of legally compliant, royalty-free images handpicked by a team of professional editors at Pickit. Legally Cleared™ is a unique licensing model ensuring you can use all photos, icons, and clipart images provided by Pickit for any use case. Our only restriction is that you can't resell the images. Otherwise, use them for your presentations, docs, website, blog, email campaigns, social media, print media, and more.
As an Admin, you can save Pickit Stock™ directly to your Media or add to your collections. First select the Pickit Stock™ tab. From here, either browse the collections or search a specific key term. To save to files your Media, click the cloud icon. To add to a collection, simply drag and drop media files from the left side of the screen into the collection. When you add a file directly to a collection, the file will also automatically save to your Media view.
Please reference the Curation section below to learn more about Collections.
Media Markets
For the Media feature, we offer direct integrations with Getty Images, Adobe Stock and Shutterstock to make the process of managing your content even easier. With all three integrations you will be prompted to login with your respective account credentials to connect to Pickit. Once connected, you will be able to search for and import images directly into collections or the Media view. For more information, please reference our Integrations for Admins Guide.
Import
With Media, you can access import integrations capabilities with Microsoft 365, Box, Dropbox, Google Drive, and Adobe Creative Cloud. Here you will be prompted to login to your respective account information to get integration access.
The Microsoft 365 integration allows you to connect to your SharePoint, Teams and OneDrive environments to easily search for, import individual files and/or sync folders with Pickit. Similarly, we allow you to connect Box, Dropbox, Google Drive and Adobe Creative Cloud to search for and import individual files or folders. For more information, please visit the Integrations for Admins Guide.
Export
You can export files out of Pickit directly into Microsoft 365, Dropbox and HubSpot. Start by selecting which environment to connect to. With each connection, you can select collections or individual files to export from Pickit back to your Microsoft 365, Dropbox or HubSpot environment. Before exporting, just review file types and configure the export to occur once or reoccur daily.
Curation
How to Start
Our main organization system for the end user experience is a folder or album type environment we call Collections. Typically, images in a collection share a common theme or concept. Collection Groups are an organization system where you can easily group together multiple collections that share a common theme or concept. Select the Create button on the Curation side of the screen and this will give you two options, to create a Collection or Collection Group.
Collection - A new window will appear where you can edit basic information including Collection Name, Sharing and Thumbnail. When ready, click the Create collection button.
Collection Group - A new window will appear where you can edit Group Name, Collections and Share to. When ready, click the Create collection button.
After you create a collection there are two ways to add media files.
Option 1 - Drag and drop media files from the left side of the screen into the collection from a media view.
Option 2 - Click a collection thumbnail to open it and click the Upload to collection button at the top to add files directly to the collection.
Please reference the Sharing section below to learn more about how to change permission access.
Editing Collections
When you hover over a collection thumbnail in the curation view, a few icons will appear that you can click.

Eye Icon - Shows you how the collection looks to an end user when its open.

Gear Icon - Opens the edit view you saw upon creation of the collection where you can change the Collection Name, Share to and Thumbnail.

Trash icon - Allows you to delete the collection.
Collection Thumbnail Size - A dropdown menu on the upper left corner of a collection thumbnail with options to select Small, Medium or Large display size. Select the size and the thumbnail will adjust accordingly.
You can rearrange the order of collections within the same size category (Small, Medium or Large) by dragging and dropping the collection thumbnail.
When you hover over a collection group, only the Pencil and Trash icons appear.
Curation Resources
Need some curation ideas? Click Curation Guide at the top of the curation screen, to launch a separate webpage guide. Or click this link to access the same guide.
Sharing
Now that you have content in your asset library, you can decide who has access. Please note that only Admins determine the sharing permissions and you can change these permissions at any time.
Share to
For internal sharing permissions, we provide three different tiers: All users, Specific users, and Admins only.
All users is as simple as it sounds, it gives access to every user.
If a document has different sharing permissions than the collection it's in, it will assume the permissions of the collection. A notification will appear on the screen when this occurs.
Specific users allows you to segment your DAM so that every user can see the most relevant content for them. You can select specific users by email address or use Azure Active Directory Groups to select a group with one click. Only the users selected will see this content on the web and in the add-in.
Admins only provides access to admins. You might opt in to use this setting while you are in the process of uploading content and adding metadata. No users will see content set to Don't Share on the web or in the add-in.
Select contributors
Admins can assign contributor access to users on a collection basis. This will allow a user to upload files to that specific collection.
External access
We also allow you to share documents collections outside of your organization. Here we have three different options: External users, Allow members to invite external users to this collection, and Allow weblink.
Share to external users prompts you to enter an email address for a person you'd like to provide collection access to. They'll receive an email from Pickit with the request to create a password to privately access the secure collection.
Allow members to invite external users to this collection allows all users to follow the steps outlined in the External users section. This can only be activated by admins.
Allow anonymous users to access this collection provides a public access weblink, so anyone who sees this link will be able to view the collections.
Social Media icons appear as an option when sharing from the add-in. Click an icon to share a collection to Facebook, LinkedIn or Twitter.
Media is available with both the Enterprise and Business Plans, but the Enterprise plan has some additional capabilities. This guide looks at the experience for both Enterprise and Business Plan admins. If you'd like to learn more about our different plans and pricing, please visit pickit.com/pricing.
FAQs
What versions of Office does Pickit work with?
For the best user experience, we encourage using Pickit with Microsoft 365 or Office Online. We do also support add-in usage on Office 2019 and 2016.
What file types and sizes can I upload to Pickit?
Media - Pickit supports file types .ai, .eps, .psd, .tif, .jpg, .gif, .png, .svg, .mp3 and .mp4. There is no limit on individual file size.Where are media files and documents stored?
All the media files and documents you upload to Pickit as an administrator are stored in a secured and private Azure based DAM system. You'll never be charged for Azure consumption.
How do I turn on Single Sign-On?
Log in to the Content Administration view on the web and navigate to More > Settings > Single Sign On and click the Connect to Microsoft button.
How do I connect Azure Active Directory to Pickit?
To connect to your company directory, sign in to your account and go to the Content Administration view. Then go to Invite People > New > Group > O365 group.
What is centralized deployment? (Available for Microsoft365 only)
A quick roll-out process where your Global Office administrator can push the Pickit Add-in to end users in a few minutes using your Azure Active Directory. After central deployment, the Pickit add-in will appear in the ribbon of Office apps for assigned users.
Where do Pickit administrators manage their asset library and what can they do?
You'll manage the whole DAM system from the web version of Pickit which you can log into at app.pickit.com. Admins can upload images, upload documents, organize collections, curate and style the DAM, invite users, view analytics, etc.
How do I log in to Pickit online?
You can log in using your email/password credentials or single sign-on at app.pickit.com.
How do I invite users?
If single-sign-on is activated you do not need to manually invite users, they will simply log in by clicking the "Sign in with Microsoft" button.
To manually invite users, log in to the Content Administration view on the web. Select Invite People on the navigation bar, and enter the email addresses for the users you'd like to invite. They will receive an email with login instructions.
How do I download the Pickit add-in?
Option 1 - Download Pickit from the Microsoft AppSource online store.
Option 2 - Download Pickit from the Office Store. In PowerPoint or Word, navigate to Insert > Get Add-Ins and select Pickit.
Option 3 – If you have Microsoft 365, your global office administrator can centrally deploy Pickit.
For any additional FAQs please check out the Pickit Online Help Center at pickit.com/help
Reference
This is a short dictionary of terms used in this guide.
Add-in – Can also be referred to as an app or plug-in for Office. When using Pickit in PowerPoint, Word, and Teams you'll be using the add-in interface.
Admin – A Pickit admin can upload files, invite users, style the DAM and assign user permissions on the web. We do not limit the amount of admins per account.
Collections – All files (image, video, audio, document) visible by end users must live in a folder or album type environment that we call collections. Typically images in a collection share a common theme or concept
Collection Group – This is an organization system where you can easily group together multiple collections that share a common theme or concept.
Copyright – A legal permission that gives the photographer or image creator rights to publish and sell images on their terms. As an admin, when you upload images to your image bank, you can specify copyright information.
Curation – The process of styling and organizing your asset bank for a strong visual impact.
Documents – A feature accessible by Pickit admins on the web that allows you to upload and organize documents in pptx, potx, docx, dotx, pdf, xlsx and key formats. End users will be able to access documents both on the web and with the Pickit add-in.
Guidelines – A feature that allows admins to distribute a short version of a brand guide for easy end-user access.
Insights – An analytics tool accessible by Pickit admins on the web that helps you understand how users are interacting with your image bank and how you deliver against their requests. We track searches and usage of both collections and individual images. For more information please reference our Insights Guide.
Image License – A contractual agreement where the photographer or image creator agreed to terms of image usage. As an admin, when you upload images to your asset bank, you can specify image license information.
Legally Cleared – A unique new model that guarantees every image on the Pickit platform is 100% legal and 100% cleared. It's our way of saying visuals are compliant, licensed, and free to use for anything. You just can't resell the images or claim them as your own.
Media – A private and secure Azure-based digital asset management system where admins can upload and share images, videos and audio files.
Model Release – A contractual agreement where the person/people in an image have granted permission for the image to be used.
Owner – When Pickit creates an DAM we need to assign an Owner, which is just the original Admin for the DAM. You have the exact same rights as any other admin.
Pickit Academy – A resource tab in the add-in dedicated to sharing tips, tricks, and advice to make you a better presenter.
Pickit Curator –You have the option to activate a Pickit Curator. When activated, this allows a Pickit employee to log in to your asset bank for curation assistance and support.
Pickit Stock – A database of over 1 million royalty-free images that are licensed to use for anything without restrictions. Each image has been handpicked by a team of image professionals at Pickit. Admins can allow users to see Public Images or disable access.
Property Release - A contractual agreement where the owner of property used in a photograph or video has granted permission to use or publish the photograph or video.